Post by alex123ecw on Aug 30, 2008 18:33:20 GMT -5
Hello everyone, I have an idea to help out some new comers here. I will be doing classes and lessons to help out what to do and not do. Probably the only time you'll ever like something to have school in the name.
Your schedule:
1. Getting started and story lines
2. Picture quality
3. Poses and angles
4. Resizing and editing
5. Uploading and site help
6. Commentary
1. Getting started and story lines
Hello students and welcome to your first day of pic fed school, I'm your teacher, xFALLx, and first we are going to start with starting up your federation. Lesson one, making the first impression: You always want to debut your fed with a kick. Make promos in a "Your fed name here - Official thread" leading up to the event. Make sure matches aren't just guys jobbing, unless its suppose to prove a point. A good way to start off story lines is have someone mouth off to another or a heel cheat his way into a victory or something along those lines.
2. Picture quality
Picture quality is a huge thing, it can make or break the federation. Unless you have a special lamp or a high definition camera I suggest using flash. If you do use flash, dont hold the camera too close, it could get too bright, sit back a little and use the zoom button.
3. Poses and angles
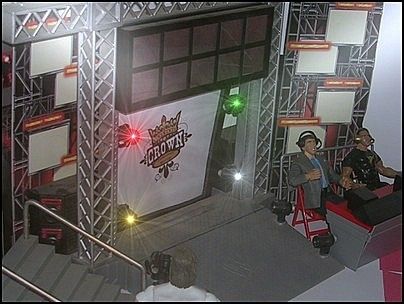
This can also make or break the federation. You want to have realistic looking poses. Don't make the figures stiff as a board, you want to try to use all/most of the articulation points. You don't want stray limbs just twisted off to the side or anything. Use string when needed, its a huge thing, you never want fingers in pictures. Angle are pretty big aswell, you don't want a sky view, or something too close, just try to make it look realistic.
4. Resizing and editing
This is probably the easiest step. After putting pictures on your computer, drag them into a folder, then highlight all of them, (CTRL+A) then right click, go to resize pictures, custom, then type in the dimensions, I use 400-350, after that hit don't make copies and make pictures smaller not larger. Editing time! If you have a photo editing program (Photoshop,GIMP, etc) then this should be easy, edit out your string and make cool effects like entrance lights, Or you could ask your teacher for help.
5. Uploading and site help
Uploading is probably easiest with photobucket, it has a bulk uploader tool allowing you to upload tons of pics at once, I think 200, after that, all you have to do is click the link and it auto copies! Instead of " Right click -> copy". After that, you have to put them on the site, free webs it probably best to use, free, simple, and self explanatory, some prefer proboards though. It's honestly your choice.
6. Commentary
I always save commentary for last, then you can see all of your pics and see whats going on and all. It always looks best when the commentators name is colored and bolded. It may seem like it would take a long time, but its a really simple. Heres a trick, go to the top of the page, bold and color the first on manually, after that, press (CTRL + F) it will bring up the word finding tool. Copy the Commentators name, make sure the colon is there also ( then just click the down arrow, right click the commentators name, and paste! Or simply press (CTRL+V) to paste it over the old plain text. This really brings out your commentary.
I really hope this helps people. I may do stuff like this again. Please sticky.
Your schedule:
1. Getting started and story lines
2. Picture quality
3. Poses and angles
4. Resizing and editing
5. Uploading and site help
6. Commentary
1. Getting started and story lines
Hello students and welcome to your first day of pic fed school, I'm your teacher, xFALLx, and first we are going to start with starting up your federation. Lesson one, making the first impression: You always want to debut your fed with a kick. Make promos in a "Your fed name here - Official thread" leading up to the event. Make sure matches aren't just guys jobbing, unless its suppose to prove a point. A good way to start off story lines is have someone mouth off to another or a heel cheat his way into a victory or something along those lines.
2. Picture quality
Picture quality is a huge thing, it can make or break the federation. Unless you have a special lamp or a high definition camera I suggest using flash. If you do use flash, dont hold the camera too close, it could get too bright, sit back a little and use the zoom button.
3. Poses and angles
This can also make or break the federation. You want to have realistic looking poses. Don't make the figures stiff as a board, you want to try to use all/most of the articulation points. You don't want stray limbs just twisted off to the side or anything. Use string when needed, its a huge thing, you never want fingers in pictures. Angle are pretty big aswell, you don't want a sky view, or something too close, just try to make it look realistic.
4. Resizing and editing
This is probably the easiest step. After putting pictures on your computer, drag them into a folder, then highlight all of them, (CTRL+A) then right click, go to resize pictures, custom, then type in the dimensions, I use 400-350, after that hit don't make copies and make pictures smaller not larger. Editing time! If you have a photo editing program (Photoshop,GIMP, etc) then this should be easy, edit out your string and make cool effects like entrance lights, Or you could ask your teacher for help.

5. Uploading and site help
Uploading is probably easiest with photobucket, it has a bulk uploader tool allowing you to upload tons of pics at once, I think 200, after that, all you have to do is click the link and it auto copies! Instead of " Right click -> copy". After that, you have to put them on the site, free webs it probably best to use, free, simple, and self explanatory, some prefer proboards though. It's honestly your choice.
6. Commentary
I always save commentary for last, then you can see all of your pics and see whats going on and all. It always looks best when the commentators name is colored and bolded. It may seem like it would take a long time, but its a really simple. Heres a trick, go to the top of the page, bold and color the first on manually, after that, press (CTRL + F) it will bring up the word finding tool. Copy the Commentators name, make sure the colon is there also (
 then just click the down arrow, right click the commentators name, and paste! Or simply press (CTRL+V) to paste it over the old plain text. This really brings out your commentary.
I really hope this helps people. I may do stuff like this again. Please sticky.


 ...
...


